When you’re planning to mount a winch to your trailer, it’s easy and common to get confused. There are too many options in deciding the style and hoisting method.
A bad connection, an unplanned setup can ruin the hard work you’re putting into it. Depending on what you tow with your trailer and how heavy the weight will be, the winch plan will vary.
So, in this guide, I’ll help you know how to mount winch to trailer with a proper plan. No matter the size of your trailer, you can plan your setup after getting through this guide.
Let’s get you started with your trailer winch.
Key Takeaways
- Decide how you want to install it; on deck or on the trailer tongue
- Use a separate battery setup for the winch if you don’t want extension cables
- Make it portable so that you don’t have to leave it outside under the sun
- Get a bumper hitch receiver plate with handles on both sides for better handling
Which Way You Should Mount A Winch?
While deciding which side you want to put the winch on the trailer, think of the purpose you will be using it for. Installing it on the far back of the trailer is no option as you’ll then end up with no functional winching.

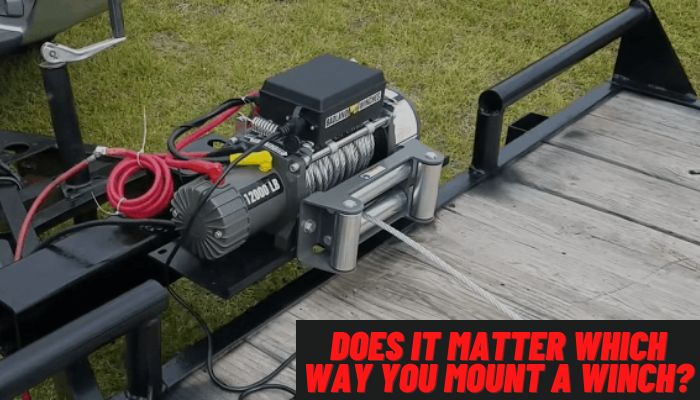
If you talk about the front though, you have two places to go with. You can either mount it on the deck itself, attached to the rail of course. Another place to mount is, right on the trailer tongue, in between the coupler and rail.
Which Place of The Trailer is Appropriate For Mount a Winch?
So, which place do you go with? Here, the tongue could be a good option if you’re planning for either of these: A permanent setup with a housing for the winch, or if you want the whole deck to be free for cargo. But this is only applicable for flatbed trailers.
Otherwise, setting up a removable winch right on the deck, to the rail will be a better option. It helps you get a functional winch with less labor and surely a lot less cost. This also is applicable for almost all sorts of trailers as it’s sitting right on the deck.
What Is the Easiest Way To Mount Winch To Trailer?
First off, if you have a heavy duty steel deck, it’s okay if you install the winch directly to the deck with 4 bolts. However, if the trailer bed is made of wood, install the trailer’s railing for mounting the winch.

With that being said, it’s time for you to find the exact center point of the trailer bed and get to work. Let’s see how to mount winch to trailer. We’ll see the process for most types of trailers you may have:
Winch Installation Process on A Flatbed Trailer
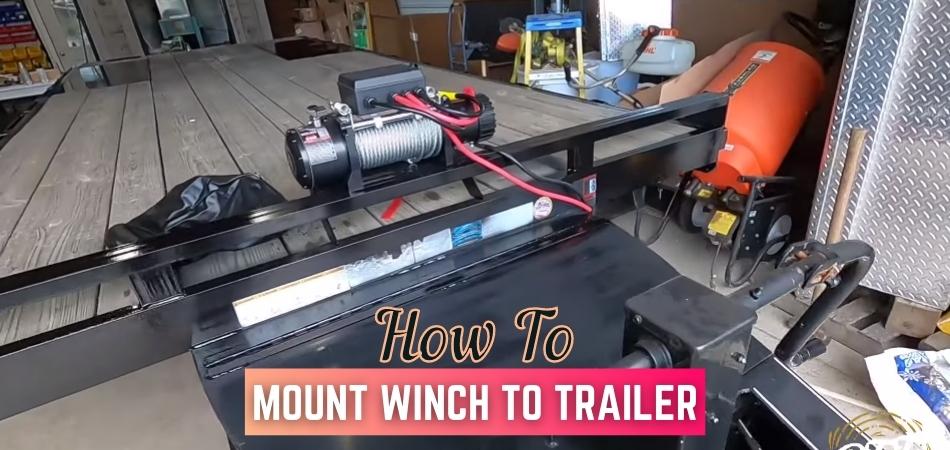
The most common type of car trailer is the flatbed trailer. If you have one such trailer, here’s how you install a winch on the deck without compromising it:
Getting the Winch Ready
First, you’ll need a metal plate to put the winch on, depending on how far you’re going to push it further. As you’re making it portable, getting a ready-to-go bumper hitch receiver plate is your best bet. Bolt your winch on it, and your winch is ready.
Here, while selecting the right cable, you may get confused. If you want better flexibility and ease in operation, you better go with a synthetic cable. Synthetic wire rope ATV winches are proven to be far safer and easier to work with as compared to steel cables that tend to leave burrs.
Installing an Extension Tube
Now you need to make an extension tube to the trailer rail where you can slide the winch in. Cut the hole on the rail bracket, making a notch, large enough to let the hitch receiver slide in and out.
After that, install the extension tube on the crossmember C channel making sure it’s aligned to the notch. If it’s not aligning, consider making use of a riser (could be another tube) and make them nice and even.
Get the Bed Ready
Put the winch plate on the trailer bed and mark out the holes on the wooden bed. This is for later use if you ever need to bolt the winch for a more secure fit. You can skip this step if you don’t want to bolt the winch to the bed.
Slide in And Get Go
Once you have the lock tube welded in place and the winch mounted to the plate, it’s time to test out. Slide the hitch receiver into the notch on the rail, align the holes of both the tubes, and secure them with a hitch pin.
Watch this video for an easier overview of the process:
Winch Installation Process on a Tilt Deck Trailer
For tilt deck trailers, the method will work just fine with a few customizations here and there. However, if your trailer has separate rails for the base and the deck, the slide-in method won’t work.

In this case, you’ll rely on the bottom holes of the mounting plate and bolt them with the bed securely. You’ll have to mark out 4 drill holes on the bed, and bolt in.
As this is not a slide-in portable winch mechanism, you don’t necessarily need a plate with a handle. A plain plate with removable receiver will do just fine.
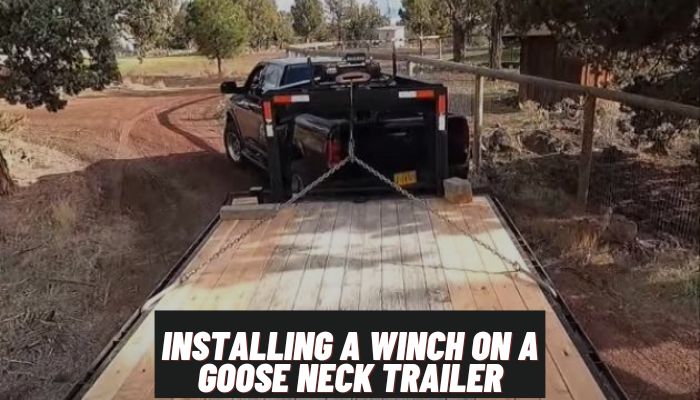
Winch Installation Process on a Goose Neck Trailer
Installing your winch on a goose neck trailer is the easiest one, especially if you have a metal rail on the neck. All you have to do is, mark out the holes where your winch will sit on.

After that, you can install the winch using standard bolts. Don’t forget to use rubber washers; they help to reduce the vibration and secure the bolts in place better than bare metal joints.
Winch Installation Process on an Enclosed Trailer
For enclosed trailers, the process is pretty much the same to a flat bed trailer. You can either install it on a stand-on or the floor without a flashy top mount.

Go get an In-floor winch mount for the enclosed trailer, and for the rope, a synthetic one will be better in this case. To install the mount, you need to attach the winch inside the mount, then bolt it down plain to the floor.
What do You’ve To Do To Wire A Winch On A Trailer?
Once you have your winch mounted to your trailer in whichever place or direction, the last stage is wiring it.

In this stage, you’ll do the wiring of the winch to the battery. It can be your car battery, but as you’re installing it far from your bonnet, you can use a separate battery, dedicated just for the winch.
However, if you want to install it to the car’s circuit breaker instead of a dedicated setup, you’ll need to use a separable long wiring connector.
Every winch might have a different type of wiring method. Here’s one common method to wire your winch:
For the tools, all you need is a 14 mm spanner to tighten up the nuts after connection.
First, you’ll start by connecting the control box (Solenoid) to the winch. You’ll have color coded wiring for them.
Connect the yellow wire from the control box with the winch. Do the same with the black one as well. There’s an earthing cable (generally a thinner one), you’ll connect this and the main earthing wire (black) together on the black color-coded main connection on the motor.
Now, for the final stage, you’ll have two red wires coming out of the control box. The shorter one goes onto the motor and the longer one to the battery for lead connection.
Once you have everything connected, use the spanner to make the connections nice and tight. Now you can connect the remote controller to the control box. Once in, the controller should have lights on, indicating that it’s alive. Now you can wind up the winch using the remote controller in and out.
Final Thoughts
A winch is as necessary as having the trailer in the first place. It helps you in safe loading and unloading. So, now that you know how to mount winch to trailer while keeping it detachable and portable, it should be an easy task for you.
Decide how you want it to work, either on deck, or on the trailer tongue, and install it accordingly. Don’t forget to put on safety gear like a pair of glasses, gloves. Test everything thoroughly before you get this thing into real action.
Recent Posts
It’s relatively easier when you’re buying a brand-new winch as you can choose one with cable or rope pre-installed. But when you’re planning on replacing the current cable winch, you will...
Getting your winch cable snapped in the middle of nowhere is not an uncommon thing. If you’re not ready for such situations in prior, you won’t have an escape from there. So, knowing a few...
